Okay, okay. I admit it. I have a bit of addiction to therapy materials. My computer is quickly filling up with files. I have a feeling yours is too? At least we’re in the same boat? Here are some tips to help you organize all of those digital materials!
STEP 1: Find a Location!
Decide whether you want to set up your files on Google Drive, Dropbox, a USB, or your computer. Google Drive and Dropbox are great, because you can access your files anywhere. A USB is also very portable. I personally use my computer as my primary storage option. I have A TON of TPT files, and I really like some of the features I have on my Mac (stay tuned!). I do use my Google Drive/Dropbox (for my favorite, most frequently used TPT products) and have my USB as a backup.
STEP 2: Create a System
Decide how you want to organize your products. Does it make more sense to sort by therapy topic? By season? By type of material (e.g., no prep, task cards, etc.)? You know what works best for you, so decide on a system and stick to it! It’ll make it much easier to find what you are looking for when you are crunched for time. Create the folders for your system.
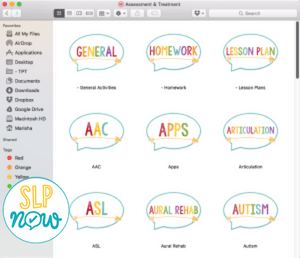
STEP 3: Everything Has a Place
Remember your system? Stick with it. Everything has a place. When you get a new product, put it away–right away. If you can’t make that happen, make sure those products still have a place (temporarily). I create an “ORGANIZE ME!” folder so that I know that I need to put those products in the right folder. Take my word for it, though: You don’t want the “ORGANIZE ME!” folder to start overflowing. It gets messy!
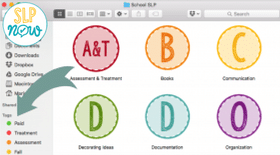
STEP 4: Use Tags
I love using tags for my digital files! I always code if I paid for something. You could also code for the type of activity (e.g., no prep worksheets, lesson plans, etc.) or the season. Lots of options! Check out this video to see how I search for products using these fun tags.
Here is a tutorial on how to make this work on Windows.
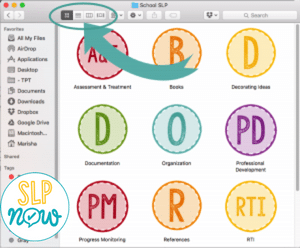
STEP 5: Change the View
Experiment with the different views. In Finder on Mac, you can choose whether you want to see your files as icons, as a list, in columns, or as cover flow. Windows has similar options, too. Try the different views and see which one works best for you. I love the icon view, because it makes it incredibly easy to see everything that you have at a glance. (Might also be why I’m obsessed with this view on TPT!)
And here’s some even more exciting news! I created three videos about how I organize my files. You can check out all the replays HERE.




[…] Want a few more quick tips? Pick a “system” for organizing your clip art. I make a folder for each artist, then keep the folders for each individual set. Decide what makes the most sense to you! To make searching easier, I use tags. I tag folders for products that are paid. I also tag different “categories” of clip art (e.g., papers, borders, etc.). Want even more ideas? Read about more digital organization here. […]