I absolutely love curriculum-based therapy (CBT). I wrote about how to get students on board and some quick tools to make CBT fun and engaging. I’ve gotten some questions about what it actually looks like in action, so I put together a quick peek at a session. Let’s get started!
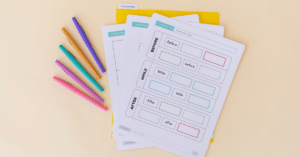
1. (Pre-Session) The Materials
For curriculum-based therapy to work, we need some materials. I touched based with the teacher a few days before the session, and she told me what they were reading in class. It was a passage about the brain (from readinga-z.com), so I was pretty excited!
2. (Pre-Session) Quick Overview
I did a quick overview of the passage before the session. I like to do this so I can gather any additional materials that I might need. In this case, I decided to pull out my model brain.
I printed out this passage, but sometimes I pull it up on Notability to save some time. It’s also a great engagement strategy.
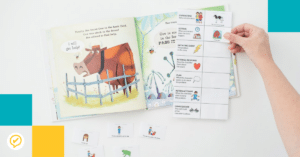
3. Check In/Review Goals
Whew! Now we’re in actual therapy.
We start off every session by checking in and reviewing our goals. The students know to grab their goal cards, and we keep them out as a visual reminder. We’ll come back to the goal cards at the end of the session.

4. Teach
Before we jump into a skill, I want to make sure I teach the students. I rely on the SLP Now Membership skill packs when I’m first introducing a skill. They include visuals (and assessments) that help me effectively scaffold new skills.

After teaching, some students draw their own visuals on their goal cards. This really helps with student engagement/ownership, and it is a great way to individualize instruction.
These students have been working on these skills for several months. We’re working towards generalization, so we didn’t use visuals this session!
4. Quick Read
We take a quick look at the passage. What do we think the passage about? Did you talk about it in class? What do you remember? What do you want to know? This is a good check for me to know where they are in class and where the students might need additional support.
I also encourage them to use other text features to support comprehension (e.g., pictures, graphs, headings). This is an important strategy for all students to use, but it is especially important for our struggling readers.
5. Practice!
These students were working on context clues and comparing/contrasting.
Because lack of vocabulary knowledge is often a barrier to comprehension, we started by identifying words that we didn’t know. This passage had LOTS! We came across some Tier 3 words (right hemisphere, left hemisphere, corpus callosum), as well as some Tier 2 words (identical, process). We challenge each other to use the words in context and keep a running tally of who uses them.

I know these students do really well with hands-on activities, so we pulled out the brain model and used sticky notes to identify the different parts of the brain (Tier 3).

We also used context clues to determine the meaning of the Tier 2 words. We used our context clues song (circle, underline, guess, check!) to help remind us to use our strategies.

I thought we would only get through the context clues practice, but they zoomed through the words. (They’re making progress! We typically spend one session sifting through the vocabulary.)
Then, the students drew a Venn diagram on the board to compare the left and the right hemispheres of the brain. We used highlighters to identify similarities and differences in the text and used the graphic organizer to make sense of it all.

6. Wrap Up
A few minutes before the end of the session, we did a quick recap. What did we work on? How did it go? What can we do next time?
Do you use the curriculum in therapy? Why or why not?


Leave a Reply