
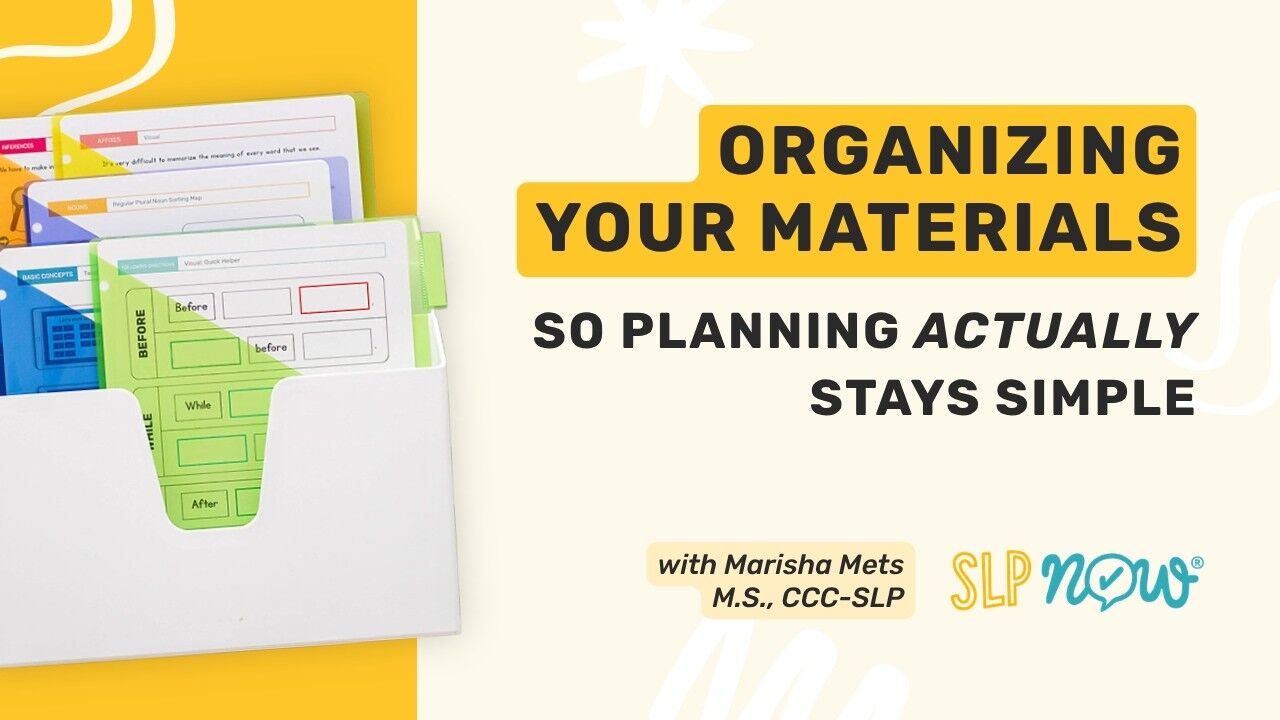
The easiest way to keep therapy planning simple is to sort your materials into two groups. Core materials are the goal cards, probes, and visuals you use every session with every group. Unit materials are the activities tied to the book, article, or video you’re using that month. Student folders connect the two. Once your core materials are set up, about 80% of your planning for the whole school year is done.
I’ve been using this system for 12 years. In this post, I’ll walk you through how I set up each part, plus a few small tricks that save me time every single week.
Why Organizing Therapy Materials Makes Planning Simple
Planning feels hard when you have to hunt for things. You know you saved that visual somewhere. You just can’t find it. And by the time you do, your group is at the door.
When every material has a home, planning gets small. Instead of starting from scratch each week, you grab what you already set up.
When your materials are organized, most of your planning happens once, not every week.
The Two Types of Therapy Materials Every SLP Needs
I sort everything into two buckets. This one choice makes the rest of the system work. Here’s what goes in each.
Core Materials: The Tools You Use Every Session
Core materials are the teaching tools I use every single session with every single group. There are three:
- Goal cards
- Probes
- Visuals
You set these up once. After that, you just update them when a student’s goals change.
Unit Materials: The Activities Tied to Your Monthly Text
Unit materials are the activities that go with the text I’m using that month. That might be a picture book, a fiction article, or a vocational video.
These change every month. You can pull them up digitally or print them. More on that below.
How to Set Up Student Goal Cards
Goal cards are the anchor for almost all of my sessions. We start every session by reviewing them. They’re simple to make, and they keep students focused on what they’re working on.
You can use index cards or small pieces of paper. Each card has one goal. The idea is that students write their goal in their own words.
If a student isn’t quite there yet, I write a short version of the goal. Then the student draws a little picture as a reminder. You can adjust this for each student.
I make goal cards at the start of the school year. When a student’s IEP is updated, we do a quick update to their cards.
Where to Store Goal Cards So They’re Easy to Grab
You’ll use goal cards at the start of every session, so they need to be easy to grab. There’s no one right way to store them. Pick what fits how you run your sessions.
Here are a few options I’ve tried:
- A calendar pocket chart. I used to put each group’s cards in the pockets.
- A big key ring. All the cards stay in one spot.
- Student folders. This is what I do now. More on that below.
How to Organize Speech Therapy Probes
Probes are the second core material. They help me collect data on each goal. Here’s how I keep them organized so I’m not digging for them in the middle of a session.
I use a big digital probe binder. It’s a PDF with thousands of probes, and it’s organized by goal. I keep it saved on my iPad home screen so it’s always one tap away.
My Page Number Trick for the Probe Binder
This trick has saved me so much time. It’s a game changer for me.
When students are making their goal cards, I look up the probe that matches each goal. Then I write the page number on the student’s goal card.
When that goal comes up in a session, I type in the page number. The probe pops up in two seconds. It has any visuals the student needs, plus my stimulus items. I collect data quickly and jump to the next student.
Write the probe page number on the goal card, and you’ll never search for a probe mid-session again.
If you use the goal bank in SLP Now, or create goals with our assessment tools, the probes are linked to your session automatically. You can pull them up digitally. I still like the probe binder sometimes, though. It’s just easy.
Building Your Own Probe Collection
You don’t have to use our probes. You can build your own collection if you’d like.
But if you don’t want to reinvent the wheel, the probe binder is inside SLP Now. Members can find it in the Data Collection course. If you’re not a member yet, you can start a free trial, go to the Academy, and find the binder in that same course.
How to Organize Visuals and Teaching Tools
Visuals are the third core material. The goal is simple. Have a visual ready for every goal on your caseload.
That includes articulation placement visuals. It also includes visuals for grammar, vocabulary, and language goals.
I keep my visuals in an accordion folder by my therapy table. I’ve also tried a hanging organizer. If you have a spot to hang a pocket chart, that works too.
Sometimes I make visuals with my students. If you’d rather skip the prep, we have pre-made sets of laminated visuals at shop.slpnow.com.
Using Student Folders to Keep Everything in One Place
Student folders are the bridge between core materials and unit materials. They hold everything one student needs. This is the setup I’ve been loving lately.
What Goes Inside Each Student Folder
When I update a student’s IEP, I go to Assessments in SLP Now. I run the assessments that fit, like articulation, phonology, language, grammar, or vocabulary. The system recommends goals based on how the student did. I use that to get baseline data and write the goals.
Then I can print a bundle of activities for that student. The bundle has the probes, evidence-backed strategies to teach the goals, and the visuals. I print it and put it in the student’s folder, along with their goal cards.
I keep the folders in a file box by my therapy table. When students come in, I pull out their folders. They open them up and go through their goal cards. We pull up the probe and visual for that goal. It’s all right there.
One folder per student means no flipping between a bunch of different places.
You get to choose what works for you. You can use one general set of materials for your caseload with the probe binder and visuals. Or you can build student folders. Both work.
Building Vocabulary Journals Over Time
I also use student folders to keep vocabulary pages. Over time, these turn into a vocabulary journal.
For categories, we have a sheet for each category. Say we’re doing animals. The student writes a student-friendly definition. At the top, there’s a quick exercise showing what is and isn’t an animal. The bottom is blank. Students paste picture cards or write examples as we go through each unit.
This helps because animals will show up in lots of picture books. The journal keeps growing, and students can look back at it. We have pages for basic concepts too, plus more traditional vocabulary journals for older students.
I don’t keep every story grammar organizer or WH questions page. That isn’t super helpful. I just keep the vocabulary pages and any work samples that are interesting or worth saving.
How to Organize Unit Materials for Monthly Prep
Unit materials change every month, so the goal here is fast prep. You have two options. You can go fully digital, or you can set up a simple paper system.
Going Digital With Your Therapy Plans
If you’re okay with digital, this part is easy. Select your therapy plan in SLP Now and pull up the activities as you go through the unit. There’s no printing and no prep.
The Copy Count Hack for Paper Prep
If you like paper, this hack helps a lot.
Say I have a preschool through fifth grade caseload. I’m always doing an early language unit, a picture book unit, and a fiction article unit. I have favorite activities I use across those units. So I make a folder for each activity in each unit.
Then I jot down how many copies I need of each one. Let’s say I have 10 preschoolers using the early language book. I want picture cards for all 10. I want the WH questions activity for all 10. But only two of my groups, six students total, use the story grammar organizer.
When I do my monthly prep, I open the therapy plan and pull up my folders. I print 10 picture cards. I print 10 WH questions. I print six story grammar organizers. Done.
I usually print the black line version so students can color and cut. Sometimes I laminate. You get into a groove, and then you just repeat it every month. If you change your mind later, that’s fine too. You get to be flexible.
Setting Up Activity Folders in Your File Box
I use manila folders for each activity in a unit. I set them up in the order I want to go through the activities. Then I grab each one as I need it.
The folders live in a file box close to my therapy table, and I reuse them every month. If I laminate anything, I tuck it inside the book so it’s there next time. If there’s an activity I want to keep, I put it in another folder for myself.
How to Build Your Starter Kit Without Getting Overwhelmed
Building your starter kit can take some time. That’s normal. Here are two ways to make it more manageable.
First, you don’t have to build everything yourself. In SLP Now, the probe binder, the visuals library, and the therapy plans are about 90% done for you. You download the binder to your iPad or computer, print some visuals, and click through your therapy plans.
Second, you can take a slower roll. Start a student folder each time you have a new IEP. Use that to build out their probes and visuals. By the end of the school year, every student will have a full set of materials.
Recap: A Simple System for Organizing Speech Therapy Materials
Here’s the whole system in one place. Core materials are your goal cards, probes, and visuals. Set them up once. Unit materials are the activities for your monthly text. Prep them in a few minutes once a month. Student folders hold it all together.
When this is in place, your planning is 80% of the way done, maybe even 90%. The rest happens right in the session. No more hunting for materials. No more printing and laminating at 9 p.m. on a Sunday.
If you’d like the probe binder, visuals, and therapy plans ready to go, you can start your free SLP Now trial here. Let SLP Now do the heavy lifting, so you can show up, be present with your students, and find the joy in this work again.
Transcript
Now we're going to dive into some tips and strategies to organize your therapy materials so planning actually stays simple.
We have two types of materials.
We have our core materials. So these are the teaching tools that we use every single session with every single group.
We have our goal cards. We have our probes, and we have our visuals. And we set these up once, and once those are organized, 80% of your planning for the entire school year is done. So that's the first thing that we want.
And then, the unit materials are what we talked about last episode, which are our activity-specific resources tied to the text that we're using that month, whether we're doing a picture book, a fiction article, a vocational video, whatever it might be.
And we can access those digitally, or we can have them printed. With that in mind, we have our core materials and our unit materials. Some tips for setting up your core materials. We start off the session by reviewing students' goal cards, and you can organize these in any number of ways.
I used to have a calendar pocket chart, and I would just put the different groups' cards in the pockets of the calendar. And just backing up a second, you can just cut out little pieces of paper or index cards and the students write their goal.
There's one goal per card or piece of paper, but the intention is that students write their goal in their own words. Or if they're not quite at that level, we might just write a quick version of the goal, and then the student can draw a little picture or visual reminder. There's different ways to differentiate that based on where the students are at.
That is a anchor for almost all of my sessions. And so that's what the goal cards are. And I like to keep my goal cards in my student folders, or you can keep them in a calendar pocket chart, like I said before, or you can put them all on a big keyring. There's different ways to set this up. Everyone does their sessions a little bit differently, so just think about what would be the easiest way to access those goal cards. 'Cause you're gonna use them at the beginning of every session, and you want them to be really easy to access. And then I just create the goal cards at the beginning of the school year, and then as students' IEPs are updated, we do a quick update as their goals change.
And then second, we have our probes. There are a number of ways to keep these organized. I have a massive digital resource that has thousands of probes in a PDF, digital binder. and I have this saved on my iPad.
I use it is when students are creating their goal cards, I go through the probe binder, and it's organized by goal, so you can easily search and find what you're looking for. But I find the probe that matches the student's goal, and then I just write the page number on their goal card.
When that goal comes up in the session, I just type the page number in the probe binder, and so I can pull up the probe in two seconds. and it has any visuals that the student might need, and it gives me my stimulus items, so it's great. but I'll just pull that up and then run the probe super quick, just jump between my students, and then that's what that looks like.
That digital binder is amazing. If you are using the goal bank in SLP Now or creating goals using our assessment tools, then the probes will automatically be linked to your session, so you can pull them up digitally. Sometimes I still like to use the probe binder. I just think it's easy, and then that page number trick is a game changer for me.
It has saved me so much time, and it just makes it easy to access those visuals in a really accessible way, like just pulling up the PDF on the iPad. I have it saved on my home screen, and so that's really easy. so that's how I manage the probes and you can build your own collection of probes if you prefer. You don't have to use ours. If you're not wanting to reinvent the wheel and you want something that's already done, that's something that you can access in SLP Now. If you're a member, the way to access the probe binder is to go through the Data Collection course.
Or if you're a non-member, you can sign up for a free trial and go to the Academy, find that Data Collection course, and then you can also access the binder. But that's a really, really great resource.
So we talked about goal cards and probes. The goal cards would just be an activity in your first session, and then the probe binder would be a little bit of work to look up the probe that matches the student's goals, but that could also be done in session potentially. And then the third component is our visuals and our teaching tools. I have an accordion folder that I usually keep by my therapy table. I also have tried using a hanging organizer.
So if you have a way to hang up a pocket chart kind of thing, you can do that. But I just make sure that I have a visual that I can use for all of my students' goals, and I have articulation placement visuals. I have visuals for all of the grammar, vocabulary, language goals, all of that good stuff.
Sometimes I might make visuals with students, but that's an option, in terms of some ideas to organize those. And we do have pre-made sets of laminated visuals. You can check them out at shop.slpnow.com. That can be a way to save yourself some time if you don't wanna do the prep for those.
That's one option. In SLP Now we have a way, whenever I update a student's IEP, I go to the Assessments in SLP Now and I run the relevant assessments, like we have them for articulation, phonology, language, grammar, vocabulary, all of those areas.
And then the system will recommend goals based on the student's performance on these assessments. I'll use that to collect baseline data and create the goals for the student's IEP. And then when I do that, I have the option to print out a bundle of activities.
And so this bundle includes the probes. And then it also includes, evidence-backed strategies to target and teach those goals. And then it also includes the visuals. I've started printing those out. I print out the visuals and the probes and all of that, and I put that in the student's folder. The probe binder and the pre-made visuals are a really good option, to get started and not have to do a ton of prep right off the bat.
I like having these individualized bundles of materials and then everything that I need for a student is in that folder, and I've really been liking that system. So you can choose what works for you. You can have, a generic set of materials for your caseload using the probe binder and the visuals.
Or you can create student folders. I have them in a file box by therapy table, and then I just pull them out as students are coming in, and I include their goal cards in their folder. So they'll open up their folder, go through their goal cards. We'll pull up the probe and the visual that goes with that goal, and it's all within the folder.
And then we'll just go from there. That's, a nice way to organize all the resources and we're not having to flip between a bunch of things. So that's what we talked about for core materials and just my brain dump of strategies.
In terms of unit materials, if you're okay with digital, you can totally just select your therapy plan in SLP Now and pull up the activities as you go through the unit. You don't have to do any printing or any prep. But if you prefer paper, let's say for the preschool through fifth grade caseload, I would always be doing an early language unit, the picture book, and a fiction article.
And I have my favorite activities that I like to use across those units. So I would just create a folder for each of the activities in each of the units. And then one quick little hack. Let's say you have 10 preschoolers that you're using the early language book for. And let's say you love using the picture cards, and you want a copy of the picture cards for every student, and you love the WH questions activity, so you want that for every group. But maybe you don't need like the categories or the story grammar activities for all of your students. You only use that for two of your groups, and so six students are using that.
So you can just jot down the number of copies that you need of each activity, and then when you're doing your monthly prep and you're opening up the therapy plan in SLP Now, you would just pull up your folders. "Okay, I need 10 picture cards. Print 10 of those. I need 10 WH questions. Print 10 of those. I need six story grammar organizers. Print six of those." And so that can help you do your prep ahead of time.
I usually like to print the black line version so that the students can color them and cut them out and do different activities with them. Sometimes I like to have the laminated version. You can decide what works best for you, and you get into your groove, and then you just rinse and repeat every month. And if you're like, eh, I don't wanna print and laminate the story grammar organizer, I'm just gonna give students their own copies, then you can do that too.
So we get to be flexible. Making some of those decisions ahead of time is helpful, and then if you wanna change your mind, you totally can. I have manila folders for all of the activities in a unit, and then I set up the folders like in the order that I want to go through the activities, and then I just run through those, and then I'll grab them as I need them.
And that's how I keep the activities organized. I just make sure that they're in a file box close to my therapy table. Then you can just reuse the folders. And then if you did do any lamination or whatnot, you can just tuck that in the book and it'll be there for next time, if you have a physical copy of the book.
Or if there are any activities that you wanna save, you can just put them in another folder for yourself.
So we talked about our core materials. We talked about our unit materials. I talked about the student folders a little bit and using those to store their probes and visuals.
I also like using the student folder to keep their vocabulary pages. It ends up being like a vocabulary journal. For categories, we have sheets that, it includes the category. Let's say we're doing animals, then the student writes a student-friendly definition, and they have a quick exercise at the top to remind them of, okay, these are examples of animals, and these are not examples of animals.
So that's like a quick refresher. And then the bottom of the page is blank, so they can paste their picture cards, or they can write in examples of items in that category as we go through the different units. I like to keep those. We have something for basic concepts, too. We have more traditional vocabulary journals for older students. And I like to keep those types of materials. I won't keep all of the story grammar organizers or all of the WH questions activities. I don't think that's super helpful. Particularly for the vocabulary goals, I think it's helpful to have a growing set to grow that journal and reference it, because there's going to be multiple examples of animals across picture books, for example, with the, categories example that I gave.
So I really like using student folders to build those vocabulary journals, and then I might keep other work samples that I think are particularly interesting or relevant.
Building your starter kit of materials can take some time. If you are feeling overwhelmed, I highly recommend checking out SLP Now to access that probe binder, our library of visuals, and then also our therapy plans because 90% of it is done for you. And then you would just need to download the binder to your iPad or computer, then print some of the visuals, and then do a couple clicks for your therapy plans and you're ready to go. So that can make it super manageable if you're feeling overwhelmed. And there is a little bit of upfront work with creating the student folders. You could also decide, like, "Okay, I'm just gonna start building this every time I have a new IEP. Like, that's how I'm going to start getting my students into SLP Now. I want it to be a slower roll." And then you can use that to build out their probes and their visuals, and all of that.
And then by the end of the school year, all of your students will have these beautiful sets of materials. So that's an option too. We talked about core materials, unit materials, and then student materials to bridge both of those. And then when we do this, your planning is 80% of the way done, maybe even 90%.
And a lot of it, you just spend a few minutes once a month prepping your units, selecting them and printing out any materials you want. And then the rest of your planning just happens in the session, and you're delivering really high quality therapy that's individualized. And you're going to see students making amazing progress and you'll have so much more time in your schedule.
You won't have to be shelling out money on Saturday or Sunday night at 9:00 PM just trying to get a unit put together, printing, laminating, cutting, all the things. You just have a really nice streamlined system with all the things that you need. You don't have to hunt for materials. You don't have to do that late night printing and laminating.
You don't have to start from scratch. You can use a system that's been tested and that I've personally been using for the past 12 years and that thousands of other SLPs have been using as well. We've had a whole team of SLPs helping us build this out. And SLP Now can do the heavy lifting, and you just get to show up and be the best therapist that you can be, and be present with your students and find some joy in being an SLP because it can be really hard when the workload becomes as heavy as it gets for a lot of us.
It really can be so much fun, and I really hope that you find that joy again and that therapy planning feels really easy for you this year.
Sign up to receive email updates
Enter your name and email address below and I'll send you periodic updates about the podcast.
FAQ
What are core materials in speech therapy?
Core materials are the tools I use every session with every group. For me, that means goal cards, probes, and visuals. I set them up once at the start of the year and update them when IEPs change.
How do I organize speech therapy probes?
I keep a digital probe binder on my iPad, organized by goal. When a student makes a goal card, I find the matching probe and write the page number on the card. In the session, I type in that page number and the probe is ready in seconds.
What should go in a speech therapy student folder?
I keep each student's goal cards, probes, and visuals in their folder. I also keep vocabulary journal pages and any work samples worth saving. That way everything I need for that student is in one place.
How do I prep therapy unit materials each month?
If you're okay with digital, pull up the activities right from your therapy plan. If you like paper, make a folder for each activity and jot down how many copies you need. Then monthly prep is just printing those numbers.


